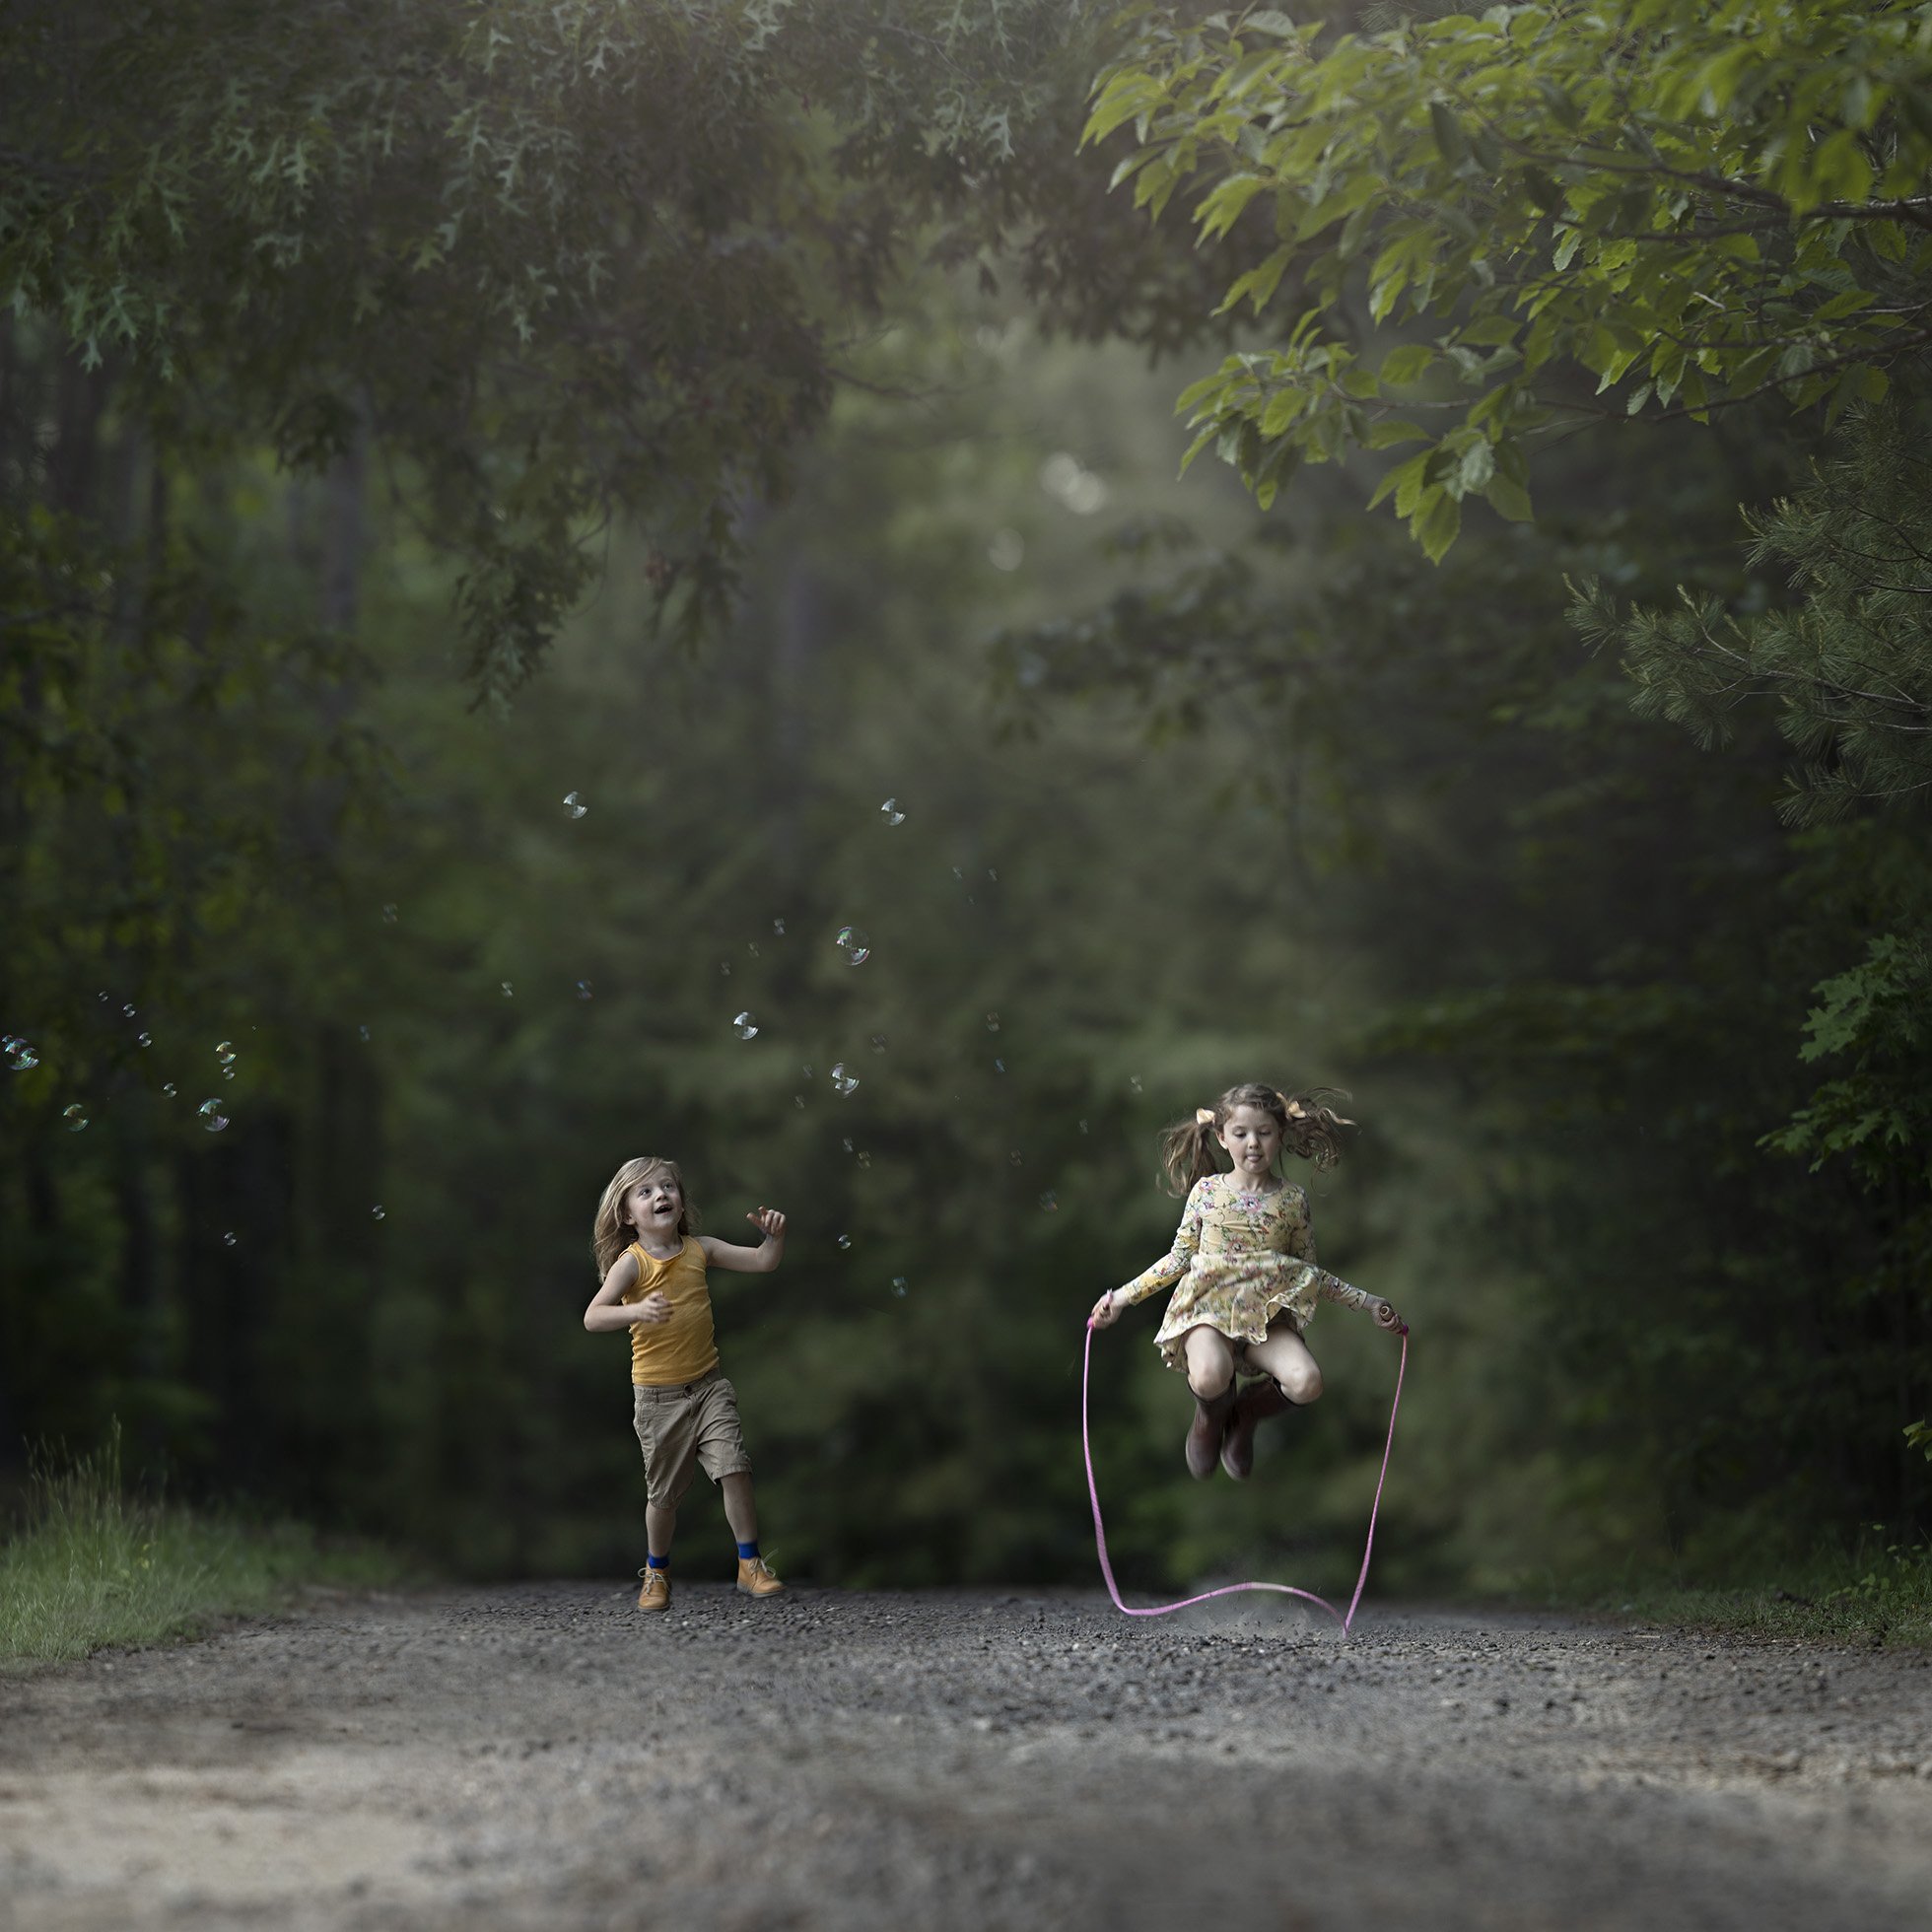
What exactly is a composite anyway? In photography, a composite is a photograph made by combining two or more separate photographs together. I have created composites with only two photos and composites with so many photos that I lost count! It is an extremely useful technique and gives you the flexibility to shoot in situations in which you may not have originally thought possible.
WHY USE COMPOSITES?
There are so many reasons artists choose to create composites I can’t possibly touch upon them all in this blog post. But here are a few of my favorite reasons for using them and why I find myself creating them again and again.
SPACE
This technique is wonderful to use if you you find yourself in a physically restricted space. Maybe you are in a small room and cannot back up far enough to include the entire scene in your camera’s frame. In that situation I may end up taking a photo of the right and left sides on the room (or the top and bottom halves) and combining them in Photoshop.
Another example in which space might be an issue would be if you are shooting in a tricky outdoor location. Let’s say there is a road in the way or you are trying to shoot your subject on a bridge. In those situations you have to work with your surroundings and you may not be able to stand in the exact spot that allows you to get your ideal shot. This technique will give you the flexibility to shoot the entire scene.
When I was shooting the image below, I could only stand in this particular spot. I was not able to fit this entire scene in my camera frame. I really wanted my daughter standing on the dock and the beautiful colors of the Fall leaves. So, I had to shoot the four corners of the image and combine them in Photoshop (I will talk more about the “corners” of an image in just a bit).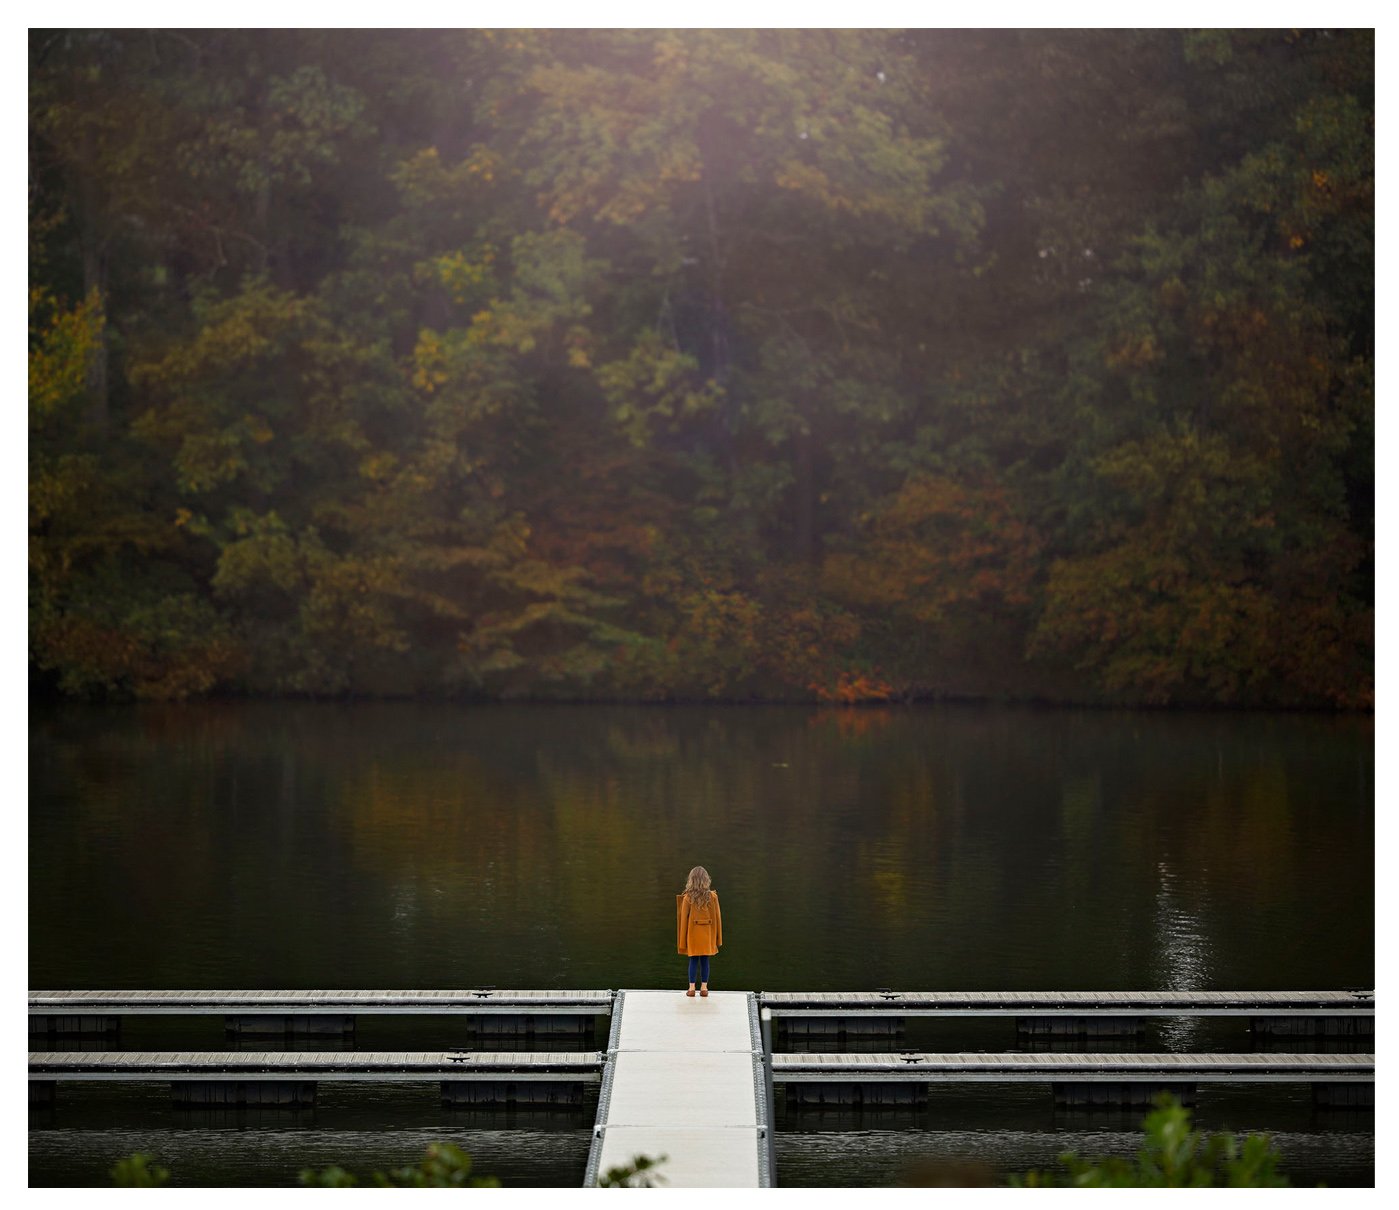
UGLY LOCATIONS
Another situation in which you may find yourself wanting to create a composite is if you are shooting a scene that was not in an ideal location. Or perhaps the location had qualities that you did not want to include in your final image. I may or may not have shot a photo by a dumpster behind a grocery store once!
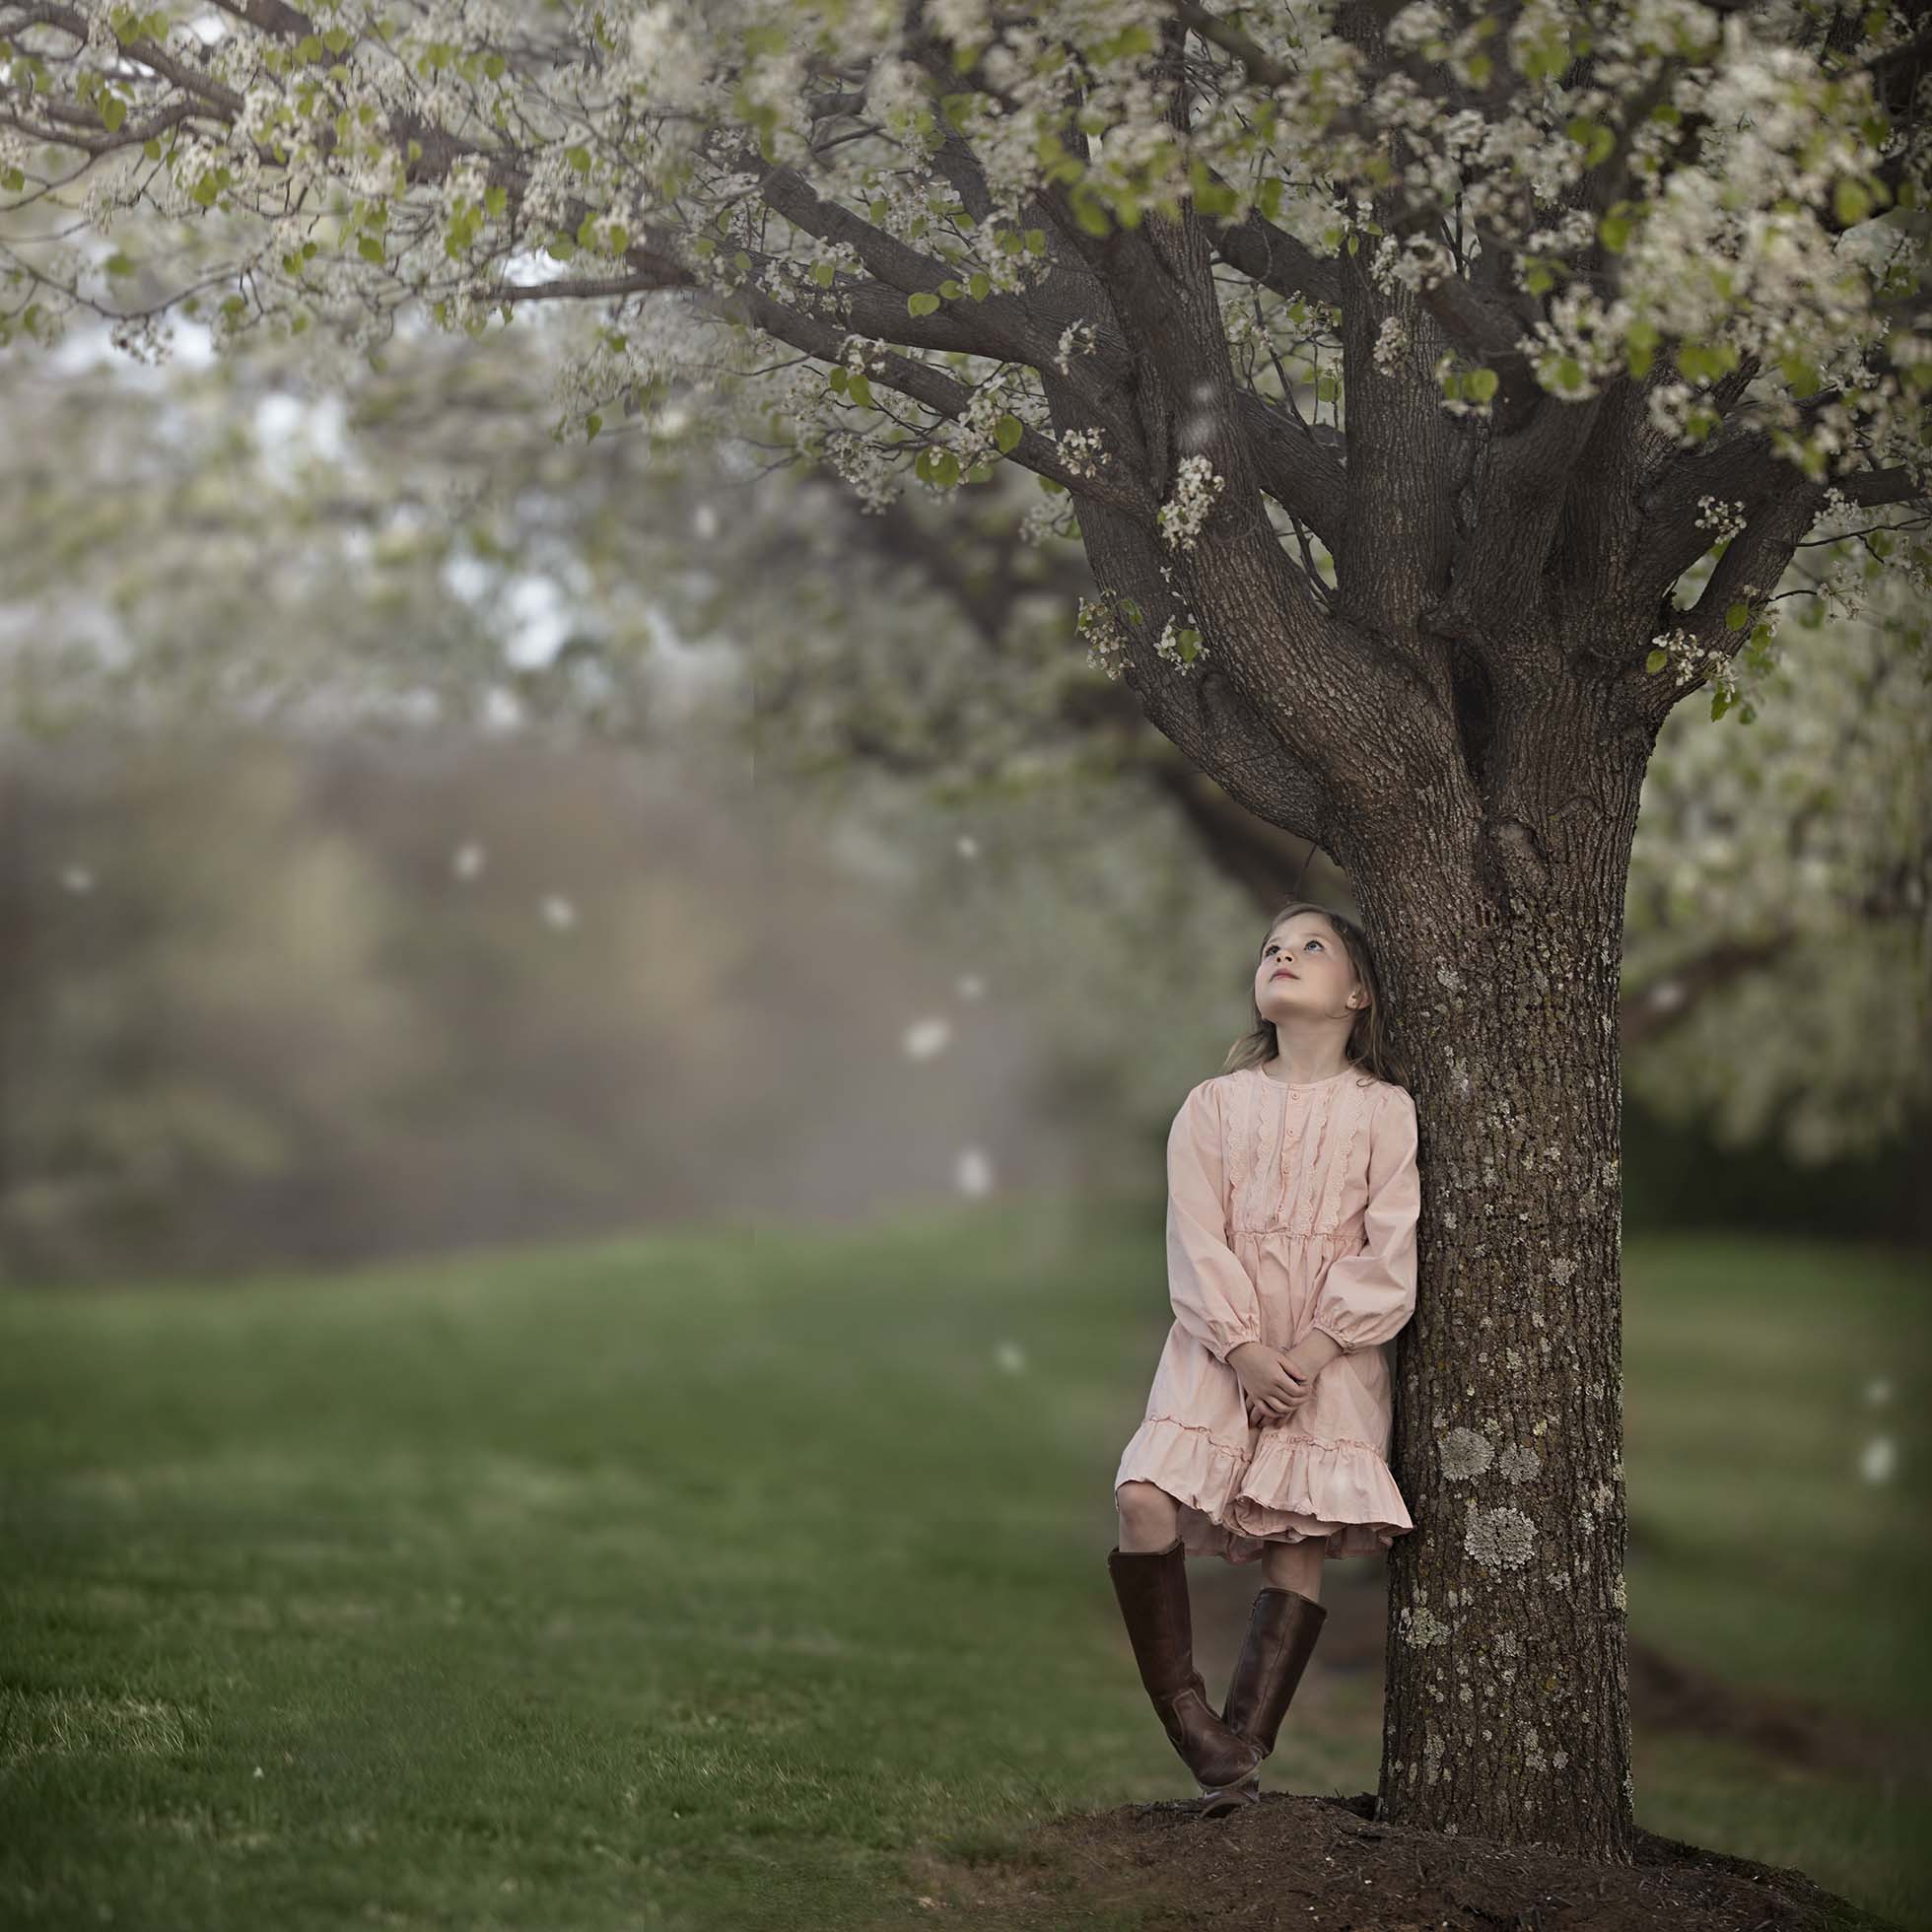
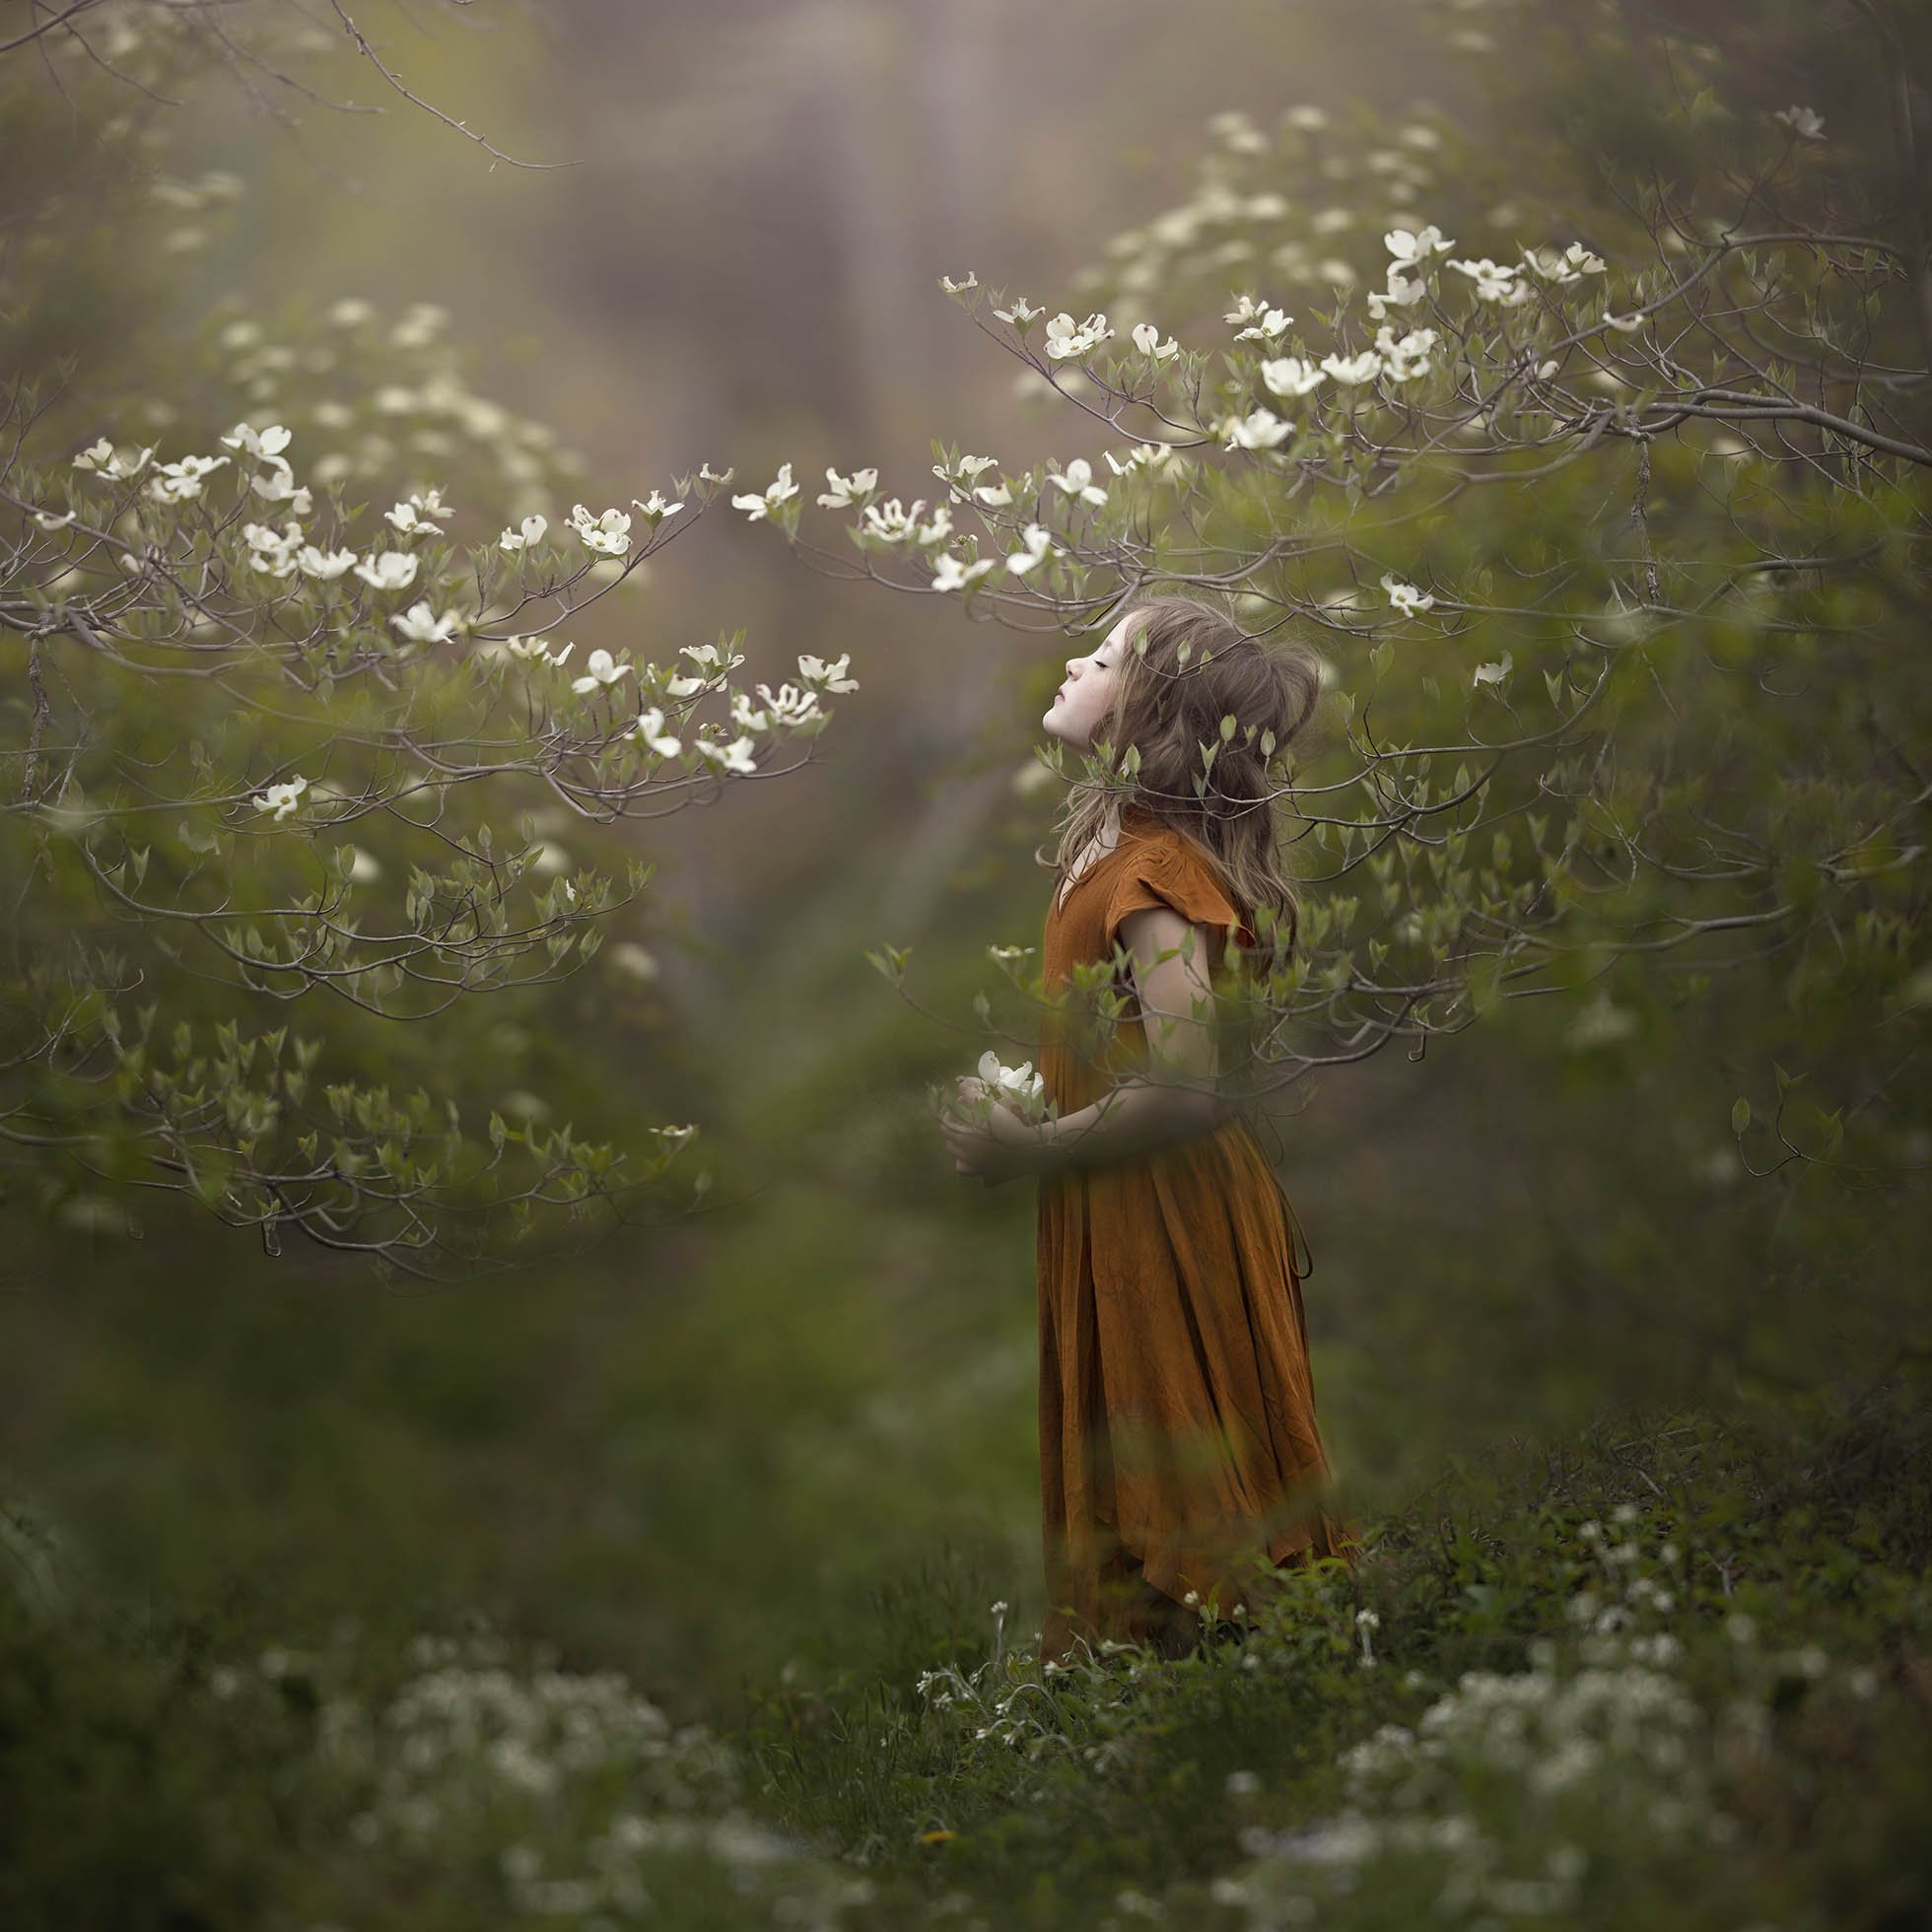
Let’s say there is a beautiful tree blooming right next to a busy road. You know you want to capture the tree, but do not want to include the road in your final image. This technique is a life saver when it comes to this kind of scenario. With the power of Photoshop you can easily crop out the road and replace it with some complimentary greenery that enhances the scene instead of detracting from it.
You would never know that the image below was shot in a tiny median between a busy road and a construction sight. There was a small row of blossoming trees that I knew would make for a beautiful photograph. So I had to get creative to capture the trees and my daughter. I then used Photoshop to edit out the ugly elements that I did not want included.
ACHIEVE MORE BACKGROUND BLUR
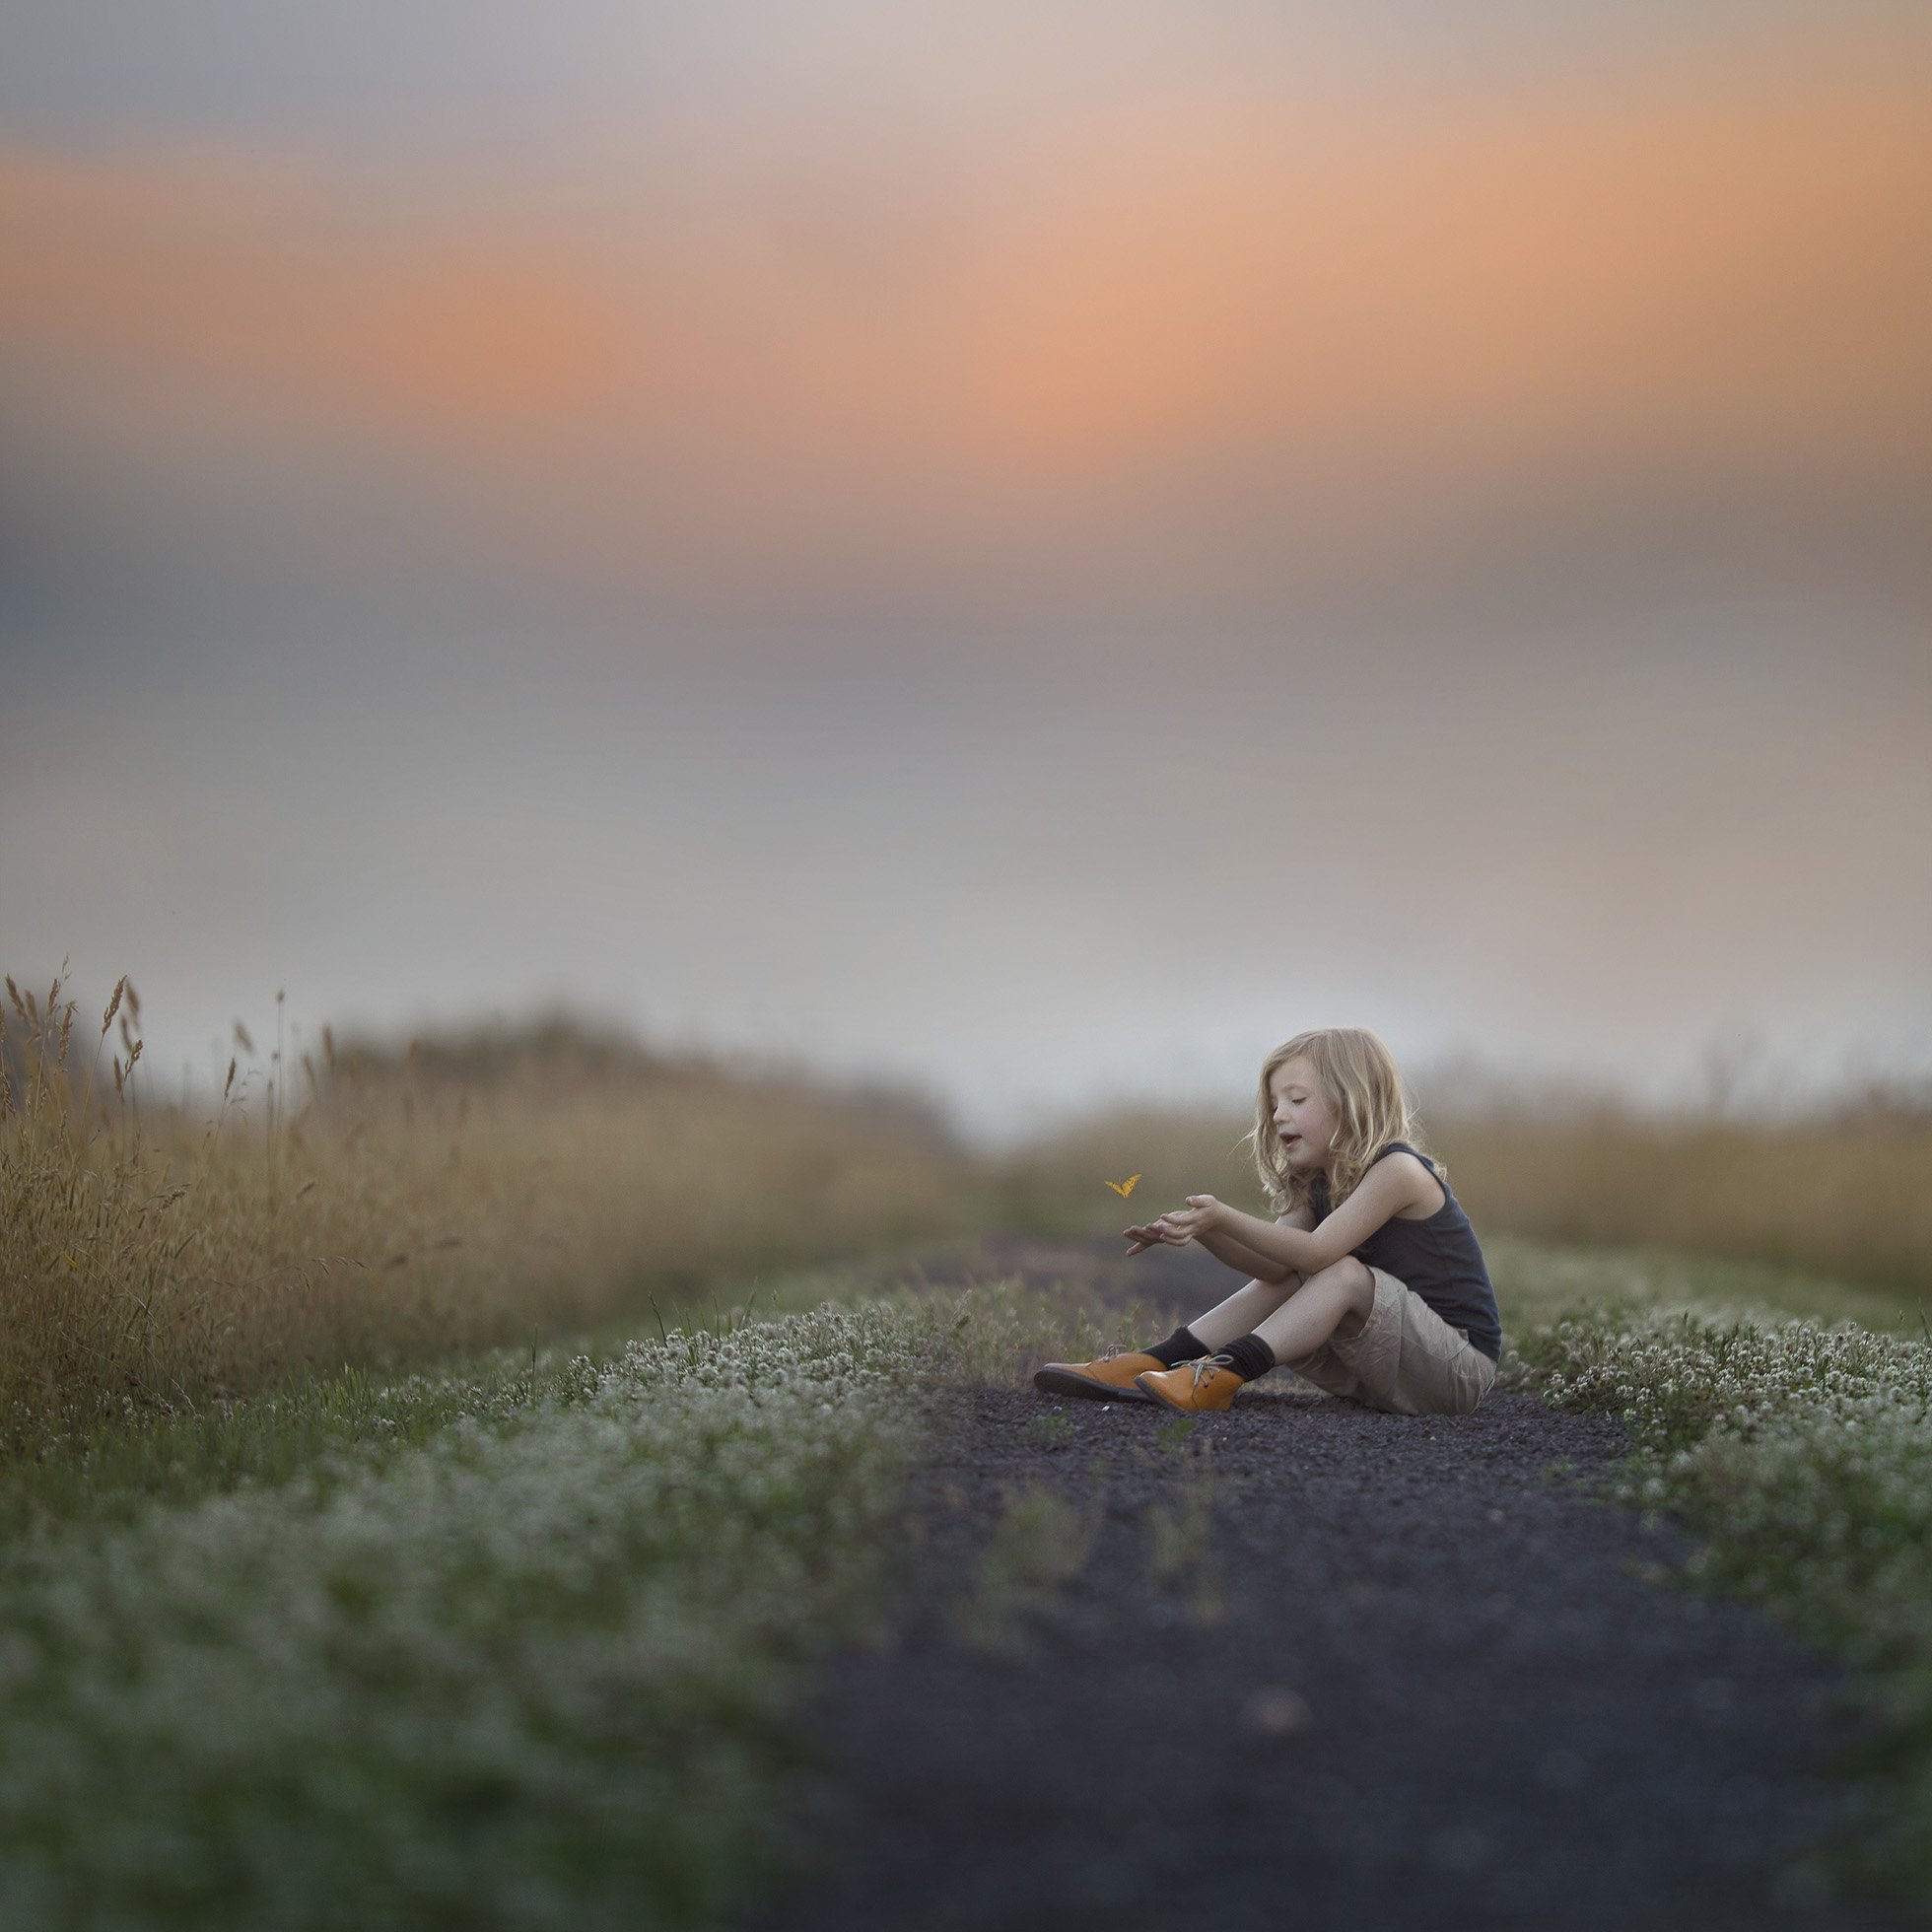
If you look at my photographs, it will become apparent that I am pretty much obsessed with creating as much background blur as possible. I seriously cannot get enough of that soft, creamy blur in my backgrounds. I love how it helps separate the subject from the rest of the image. It also allows your eye to focus on the main subject before taking in the rest of the scene. This method is ideal if you want to achieve greater background blur. It is actually the main reason I started creating composites in the first place!
When I first started shooting composites I was using my 85mm lens. I wanted to include my entire subject in the scene and the surrounding area as well. But I found that even though my lens was set on the shallowest depth of field, too much of the image was still in focus for my liking. By getting closer to my subject (and using this technique) I was able to achieve the background blur I was so desperately seeking.
When choosing a location I have to decide how much of the surrounding area I want to include in the final image. I then get CLOSER to my subject and try to get as much of their body in the frame as possible. I then take several photographs of the surrounding area which I then use to blend together in Photoshop. Because this technique allows me to get closer to my subject, I am able to achieve greater background blur than if I was shooting from further away.
The closer you are to your subject the more blurred the background will be. The further the subject is from the background the more blurred the background will be. So you need to find the perfect distance between you, your subject, and the background. It is a delicate balance!
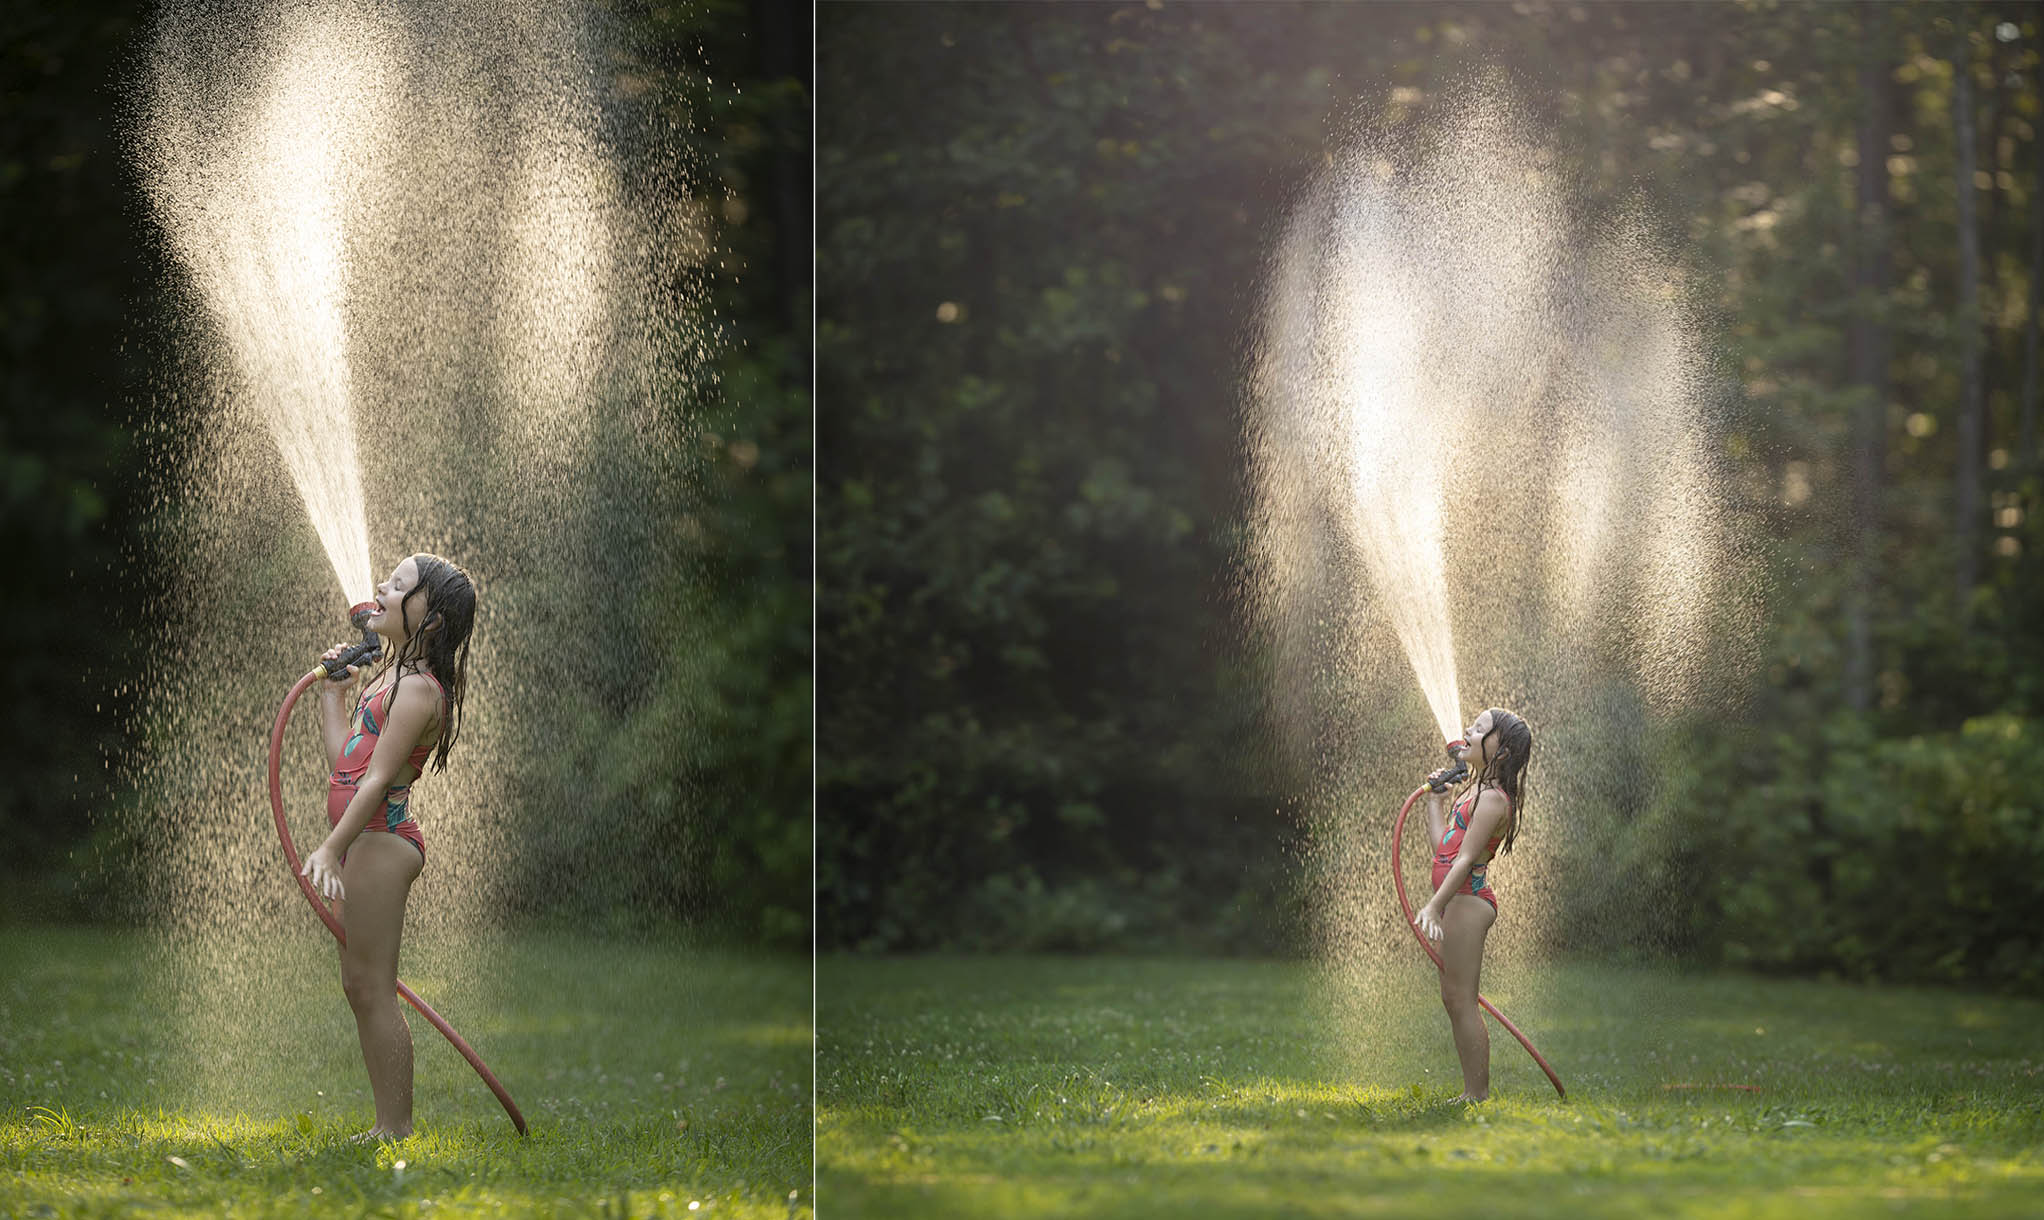
If you look at the images above you will see the original image on the left. I photographed my daughter and then I took several images of the area surrounding her. The final image on the right is a composite of six images. I chose to create a composite for this image because I was limited on space (there was a pool behind me and I couldn’t back up any further) and I wanted the woods behind her to be as blurry as possible so that she really stood out.
BLENDING YOUR IMAGES
Once you have your scene in place and you have found the magical distance between yourself, the subject, and the background you are ready to start shooting. Get your shot of your subject first and then photograph your surroundings. I like to make sure that I get a shot of each “corner” of my future image.
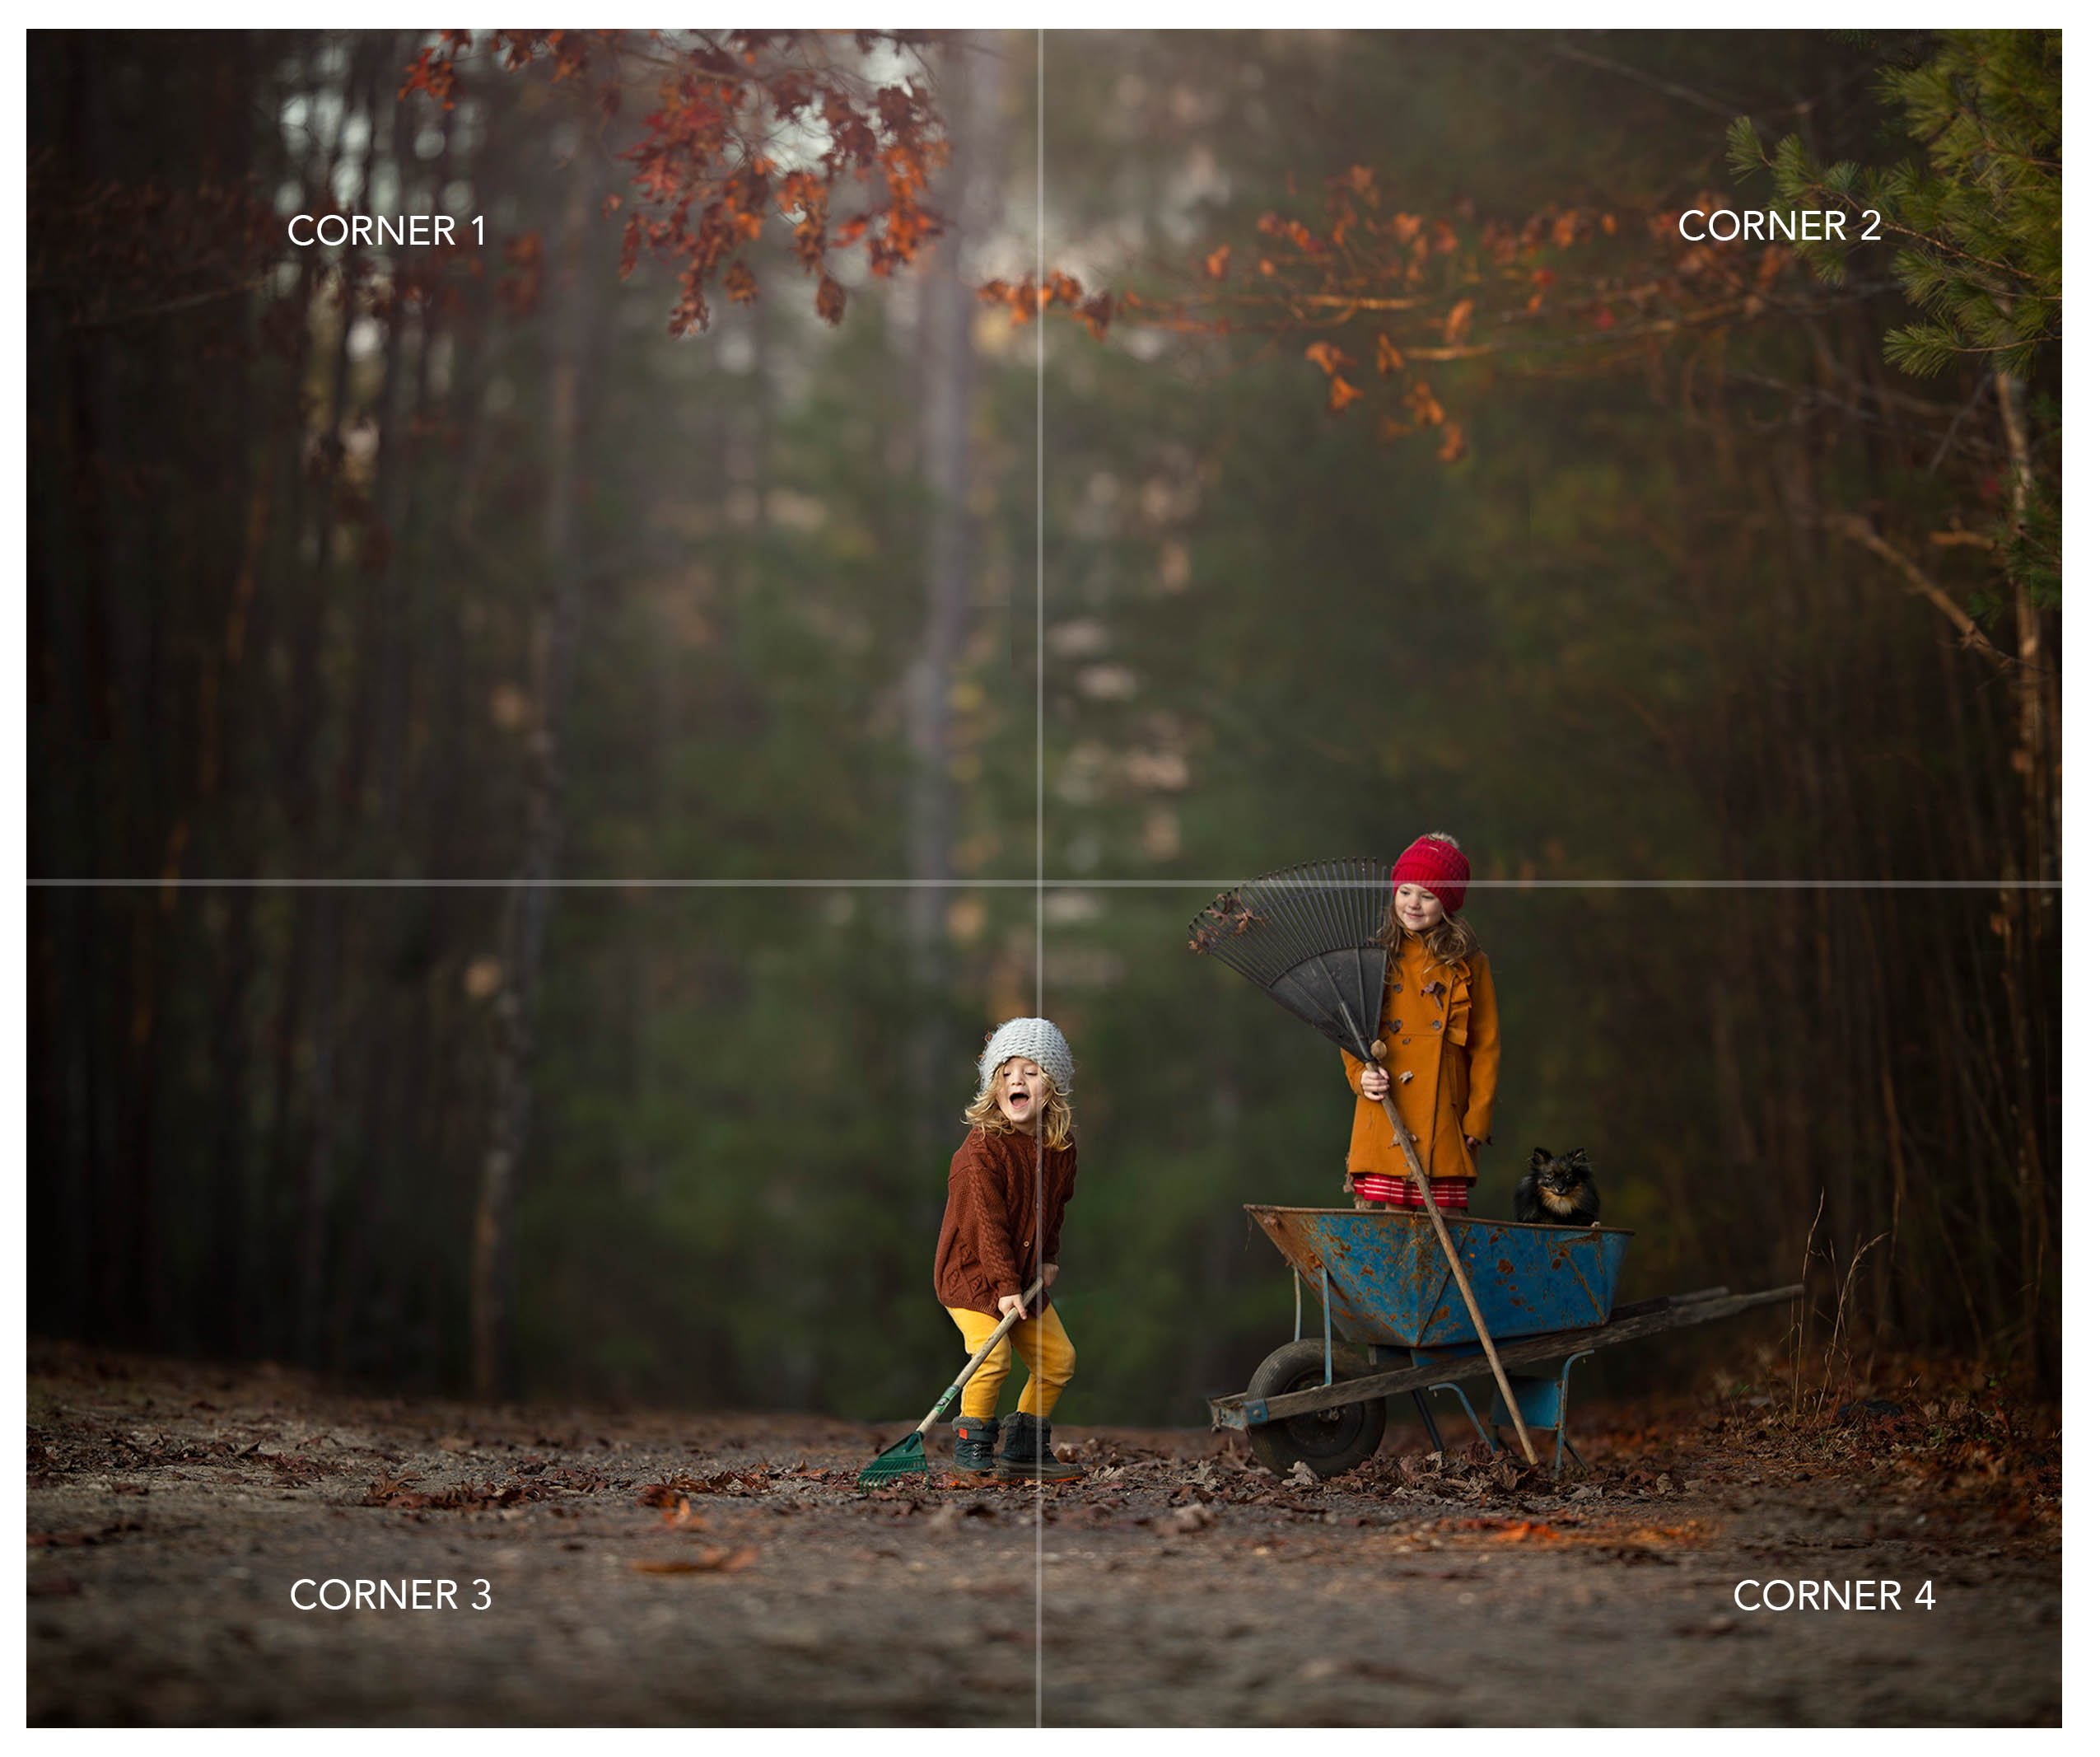 Once you have photographs of all your corners, you can blend them together in Photoshop to create your final image. If you would like to learn more about how I create these types of images, check out my mini course Creating Outdoor Composites. In the course I walk you through my creative process and teach step by step instructions for recreating this technique. The course includes a 13 page instructional PDF, 2 shooting videos and 2 editing videos. I show you how I shoot and edit the two images below.
JUST A NOTE
Creating composites does take time! You will be spending more time in Photoshop piecing together multiple images than if you took a single shot. But in my opinion, the end result is well worth the effort. After a little practice, creating composites becomes second nature. Beautiful art takes time to create!
XO,
Ruth
Ruth Young is a professional portrait photographer based in Culpeper County, Virginia. She spends her days homeschooling and documenting the lives of her four (soon to be 5) children. To learn more about Ruth and her journey you can follow her here on Instagram, where she posts daily!


Be the first to comment